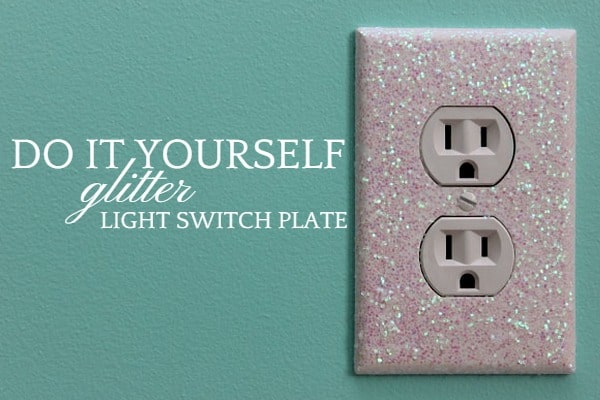
Looking to add some sparkle to a room in your home? DIY Glitter Light Switch Plates and Outlet Covers are an easy and fun home decor project!
We have been working on our daughters' bedroom makeover for two weeks now. We shared our inspiration on Instagram, and I have been working on a few different things to make this room extra special for the girls. One of the projects was glitter light switch plates and outlet covers.
When I started these, I honestly had no idea how they would turn out because I have never made anything like this before, but I love them. I think the glitter was perfect, and they look amazing in the room.
Glitter Light Switch Plates and Outlet Covers:
You can also see our paint progress on Instagram.
You can easily make these by making a quick trip to Walmart.
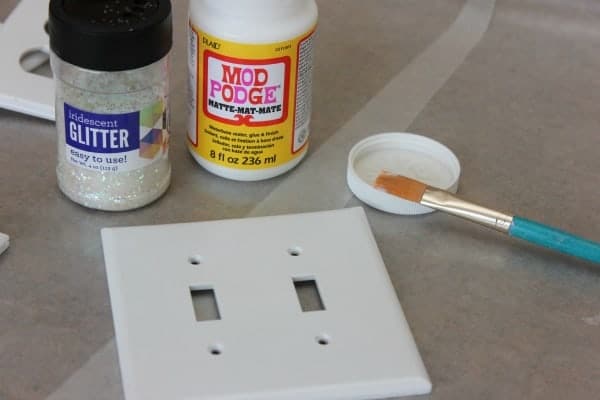
DIY Supplies:
- Light switch and outlet covers (as long as the ones you already have are in good condition, use those)
- Mod Podge
- Small Paint Brush
- Glitter (color of your choice)
- Wax Paper
- Toothpick or something to clean out holes in the plates
How you make Glitter Light Switch Plates and Outlet Covers:
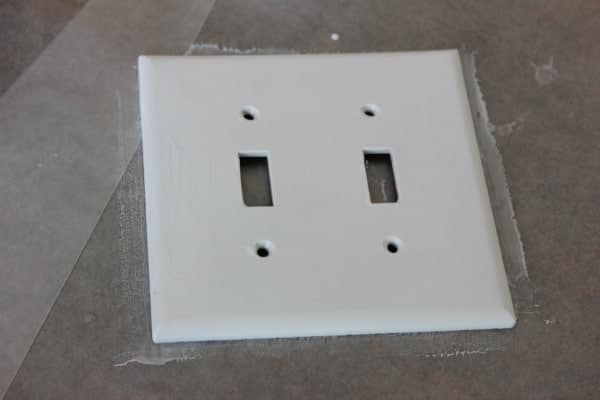
- Put out wax paper and paint one thin coat ofmod podge on the light switch plate.
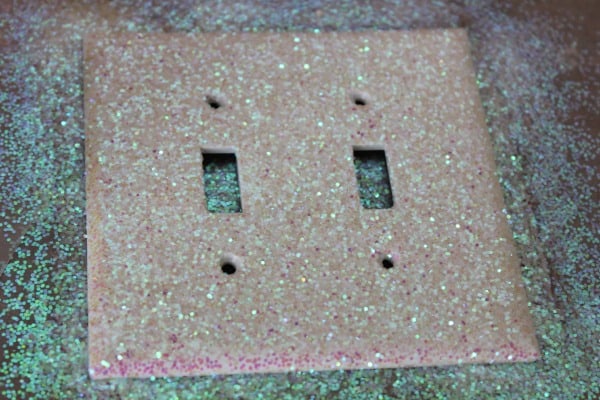
- Cover with glitter (use as much as you want, the excess will fall off) - Let dry for 15 minutes.

- Paint another thick layer of mod podge and make sure to cover completely.

- Clean out the holes for the screws. I used the inside tube of a lead pencil. Let dry for 15 - 20 minutes.

- Once it's completely dry, you can decide whether or not you need an extra coat of mod podge. I only did one coat, and it looked perfect.
Note: Don't overdo it on the mod podge or it will take forever to dry and may not look as nice.

This is the first one I made, and I went a little too thick on the mod podge. While you can't tell, it did come out a little bumpy and didn't dry all the way through. It still looks great, but the outlet covers look better.
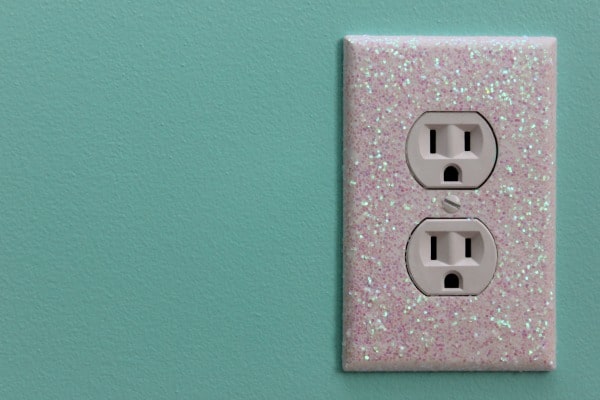
I think this one is my favorite. This outlet cover looks beautiful on the teal, and I wish they had an outlet on one of the purple walls because I think it would have been just as amazing.

I can't wait to reveal their room! I am so excited, and we still aren't done. Hopefully, I can get the painting project and chalkboard posted this week!
I don't know about you, but I love these glitter light switch plates and outlet covers!
Want to see the complete look? Check out the Little Mermaid Room Makeover Here.
📖 Recipe
Glitter Light Switch Plates and Outlet Covers
Glitter light switch plates are the perfect way to personalize any room easily!
Sometimes it's the smallest details that make a room feel unique. The cool thing about this project is that you can make it one of a kind. The sky is the limit, and you don't even have to use glitter!
Think outside the box and make your light switch plates and outlet plate covers blend seamlessly with your room while also making a statement!
This craft is so easy even the kiddos can help.
Materials
- Light switch and outlet covers (as long as the ones you already have are in good condition, use those)
- Mod Podge
- Glitter (color of your choice)
- Toothpick or something to clean out holes in the plates
Tools
- Wax Paper
- Small Paint Brush
Instructions
- Put out wax paper and paint one thin coat of mod podge on the light switch plate.
- Cover with glitter (use as much as you want, the excess will fall off) - Let dry for 15 minutes.
- Paint another thick layer of mod podge and make sure to cover it completely.
- Clean out the holes for the screws. I used the inside tube of a lead pencil. Let dry for 15 - 20 minutes.
- Once it's completely dry, you can decide whether or not you need an extra coat of mod podge. I only did one coat, and it looked perfect.
Notes
Don't overdo it on the mod podge, or it will take forever to dry and may not look as nice.
Patience is always one of the most important tools of any crafter!
If you try our glitter light switch plates tutorial please let us know! We would love to feature you.


Ashley says
I just stumbled upon this page and we are getting ready to try this out right now! I can't believe I never thought about this! I can't wait to share how it turns out!!